This was a very fun project, so easy too. (right up my alley) I've known for a while that at arts and crafts shows i wanted to showcase my silver spoons separately. One day while scouring for silverware at my local V.O.A., I spotted an old beat up suitcase that I knew would be perfect for the job. (and at 99 cents, i couldn't pass it up) I've seen other artists use vintage suitcases to sell their wares out of, but I've never seen one for jewelry. Well today was the day.
Materials: * Vintage Suitcase * 1/2 inch wooden dowels (4) * 1/2 inch dowel caps (8) * 1/2 inch drill bit * Power drill * Wood glue * Small hand saw * Tape measure * Marker
First I eyeballed it and figured out where i wanted my dowels to go on the inside. I had to take in account for the length of the necklaces when hung up to decide where i wanted the lower bar. Then I measured and marked where i wanted to drill and drilled a hole right through the suitcase. (it was surprisingly easy considering this particular suitcase feels like it's made out of a thick cardboard!)
Once all 8 holes were drilled, i measured how long the dowel would need to be and cut them to size.
*note the comfy house slippers, hey what do ya want, it's my day off ;)
I glued the dowel caps on only one end of the dowel so that i can pull them back through if needed.
Awesome finished product:
click on images to enlarge
I'm calling it 'Grandma's cupboard'
See more of my silverware creations on my web site www.sunshynesilverwear.com If you like anything you see, use coupon code 'Blog' at check out and get 20% off of your entire purchase. This code is only good for 7 days from date of post. Enjoy!
A quick and easy craft you can do with the kids. (or for yourself, if you are a kid at heart like me!)
Make these fun boats you can race, all you need is a few basic supplies that most everyone has laying around the house:
a couple of wine corks
colorful paper (i used some origami paper)
screws (for the keels)
toothpicks
scissors
a serrated knife or small hand saw
blow dryer or fan (to set sail!)
Step one: cut the cork in half lengthwise. (and a little video tip on how i did it:)
Step 2: insert a screw to serve as the keel near one end of the halved cork (on the rounded side)
you can also use a screw driver to make it a little easier.
Step 3: Cut colorful paper into small triangles and impale them onto the toothpicks.
Step 4: Stick the toothpick into the flat side of the cork and you have made yourself a cork boat! Now time to set sail!
In addition to introducing and exploring the creativity of the artists in my life, once a month I am going to take the time to share new ways I am making my life more Eco-friendly. Some easy, simple things anyone can do to make the world a 'Greener' place. I'm calling this segment 'Do it. Live it. Teach it'
~~~~~~~~~~~~~~~~~~~~~~~~~~~~~~~~~~~~~~~~~~~~~~~~~
For my first installment, I would like to show you how i made this cute, fashionable dog collar out of an old button up shirt. I found this fun tutorial on Sew Doggy Style Blog. I thought it was so cute I had to share it AND it is SO simple. The only things you need are:
~ An old button up shirt with a collar. This project is made extra easy if the collar has a button already on it like the one i am using. (best to try the collar on Fido before you cut it up to make sure that it will fit)
~ A bottle of Fray Check. This is used to stop fabric from fraying. (this can be found at any craft store. I got mine at Joanne Fabrics for $1.50 with their online 50% off coupon.)
~ A pair of scissors
~ And of course an adorable model for your finished project.
The shirt I chose to use was found in the back of my closet. It was used while painting my hallway years ago so unfortunately cannot be donated, but will be *PERFECT* for this project.
Step 1.
Cut the collar right off of the shirt.
Step 2.
Use the Frey Check on the cut you just made.
Step 3.
Oh wait, there is no step 3...your project is finished! (see, wasn't that simple)
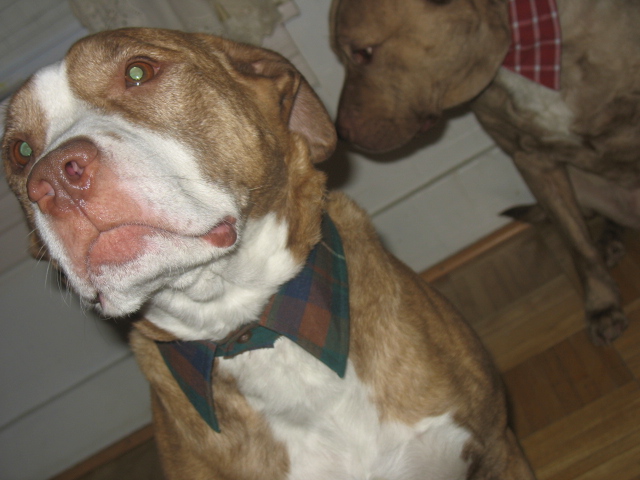
Now for the fashion show...
I know some of you out there who dont have a dog are thinking that this tutorial wont do you any good. Well THINK AGAIN! These cute collars also can also spruce up a child's old teddy bear, they make GREAT GIFTS for the dog lover in your life, or hell, spice up your love life by surprising your significant other by wearing the collar (and ONLY the collar) The possibilities are endless....;)
As for the rest of the shirt, I up-cycled it by making it into 2 chew toys for my 2 good doggies.
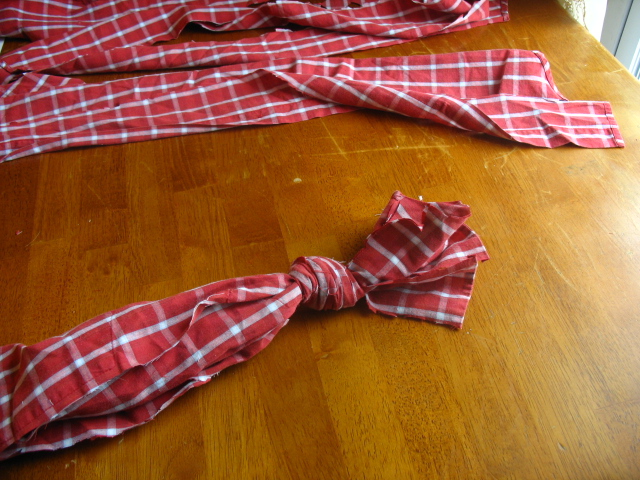
First, I took out all of the buttons. (and put them in my 'pile o craft supplies' for later use) then cut the shirt into 12 long strips, 6 strips for each toy.
Tie 6 strips together, leaving about 4 inches of cloth at the end.
After that, I just braided the strips and tied another knot leaving 4 inches of cloth at the other end and VOILA! A handmade toy your canine companion is sure to love.
Best part is, you just saved yourself at least $20 by making these items yourself rather than buying them at the big box pet store. What could be better than being green while saving some green?